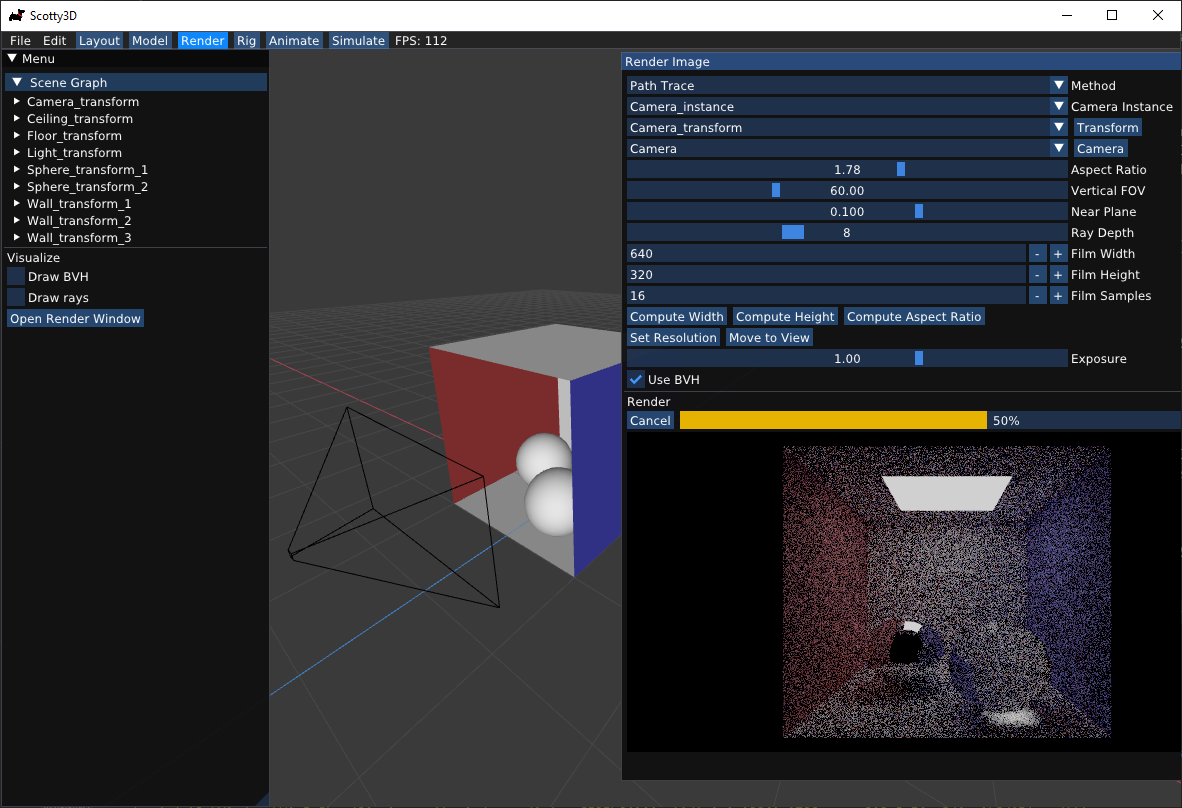
Render Options
The Render mode supports three types of rendering: Hardware Rasterize, Software Rasterize, and Path Trace.
-
Hardware Rasterizeuses OpenGL library functions to rasterize the scene as seen from the selected camera’s view. This is already included in the base code and provided by default. -
Software Rasterizeuses your solutions to A1 Rasterizer to perform software rendering of the given scene from the selected camera’s view. Note that the results ofHardware Rasterizemay yield results extremely close to what you might expect your rasterizer to ultimately output, but this is not always the case. Therefore, you may use the hardware rasterizer as your guideline, but do not rely only on that! -
Path Traceuses your solutions to A3 Pathtracer to act as a realistic, globally illuminated renderer, capable of creating images of complex scenes using path tracing. Note that you must have incident light upon objects viewed inside the scene to have them rendered using this option.
Render Window
In render mode, click on Open Render Window, and you will be able to set the parameters to render your model. Enjoy the excitement of seeing the images becoming clearer and clearer ;-)
Moving Camera
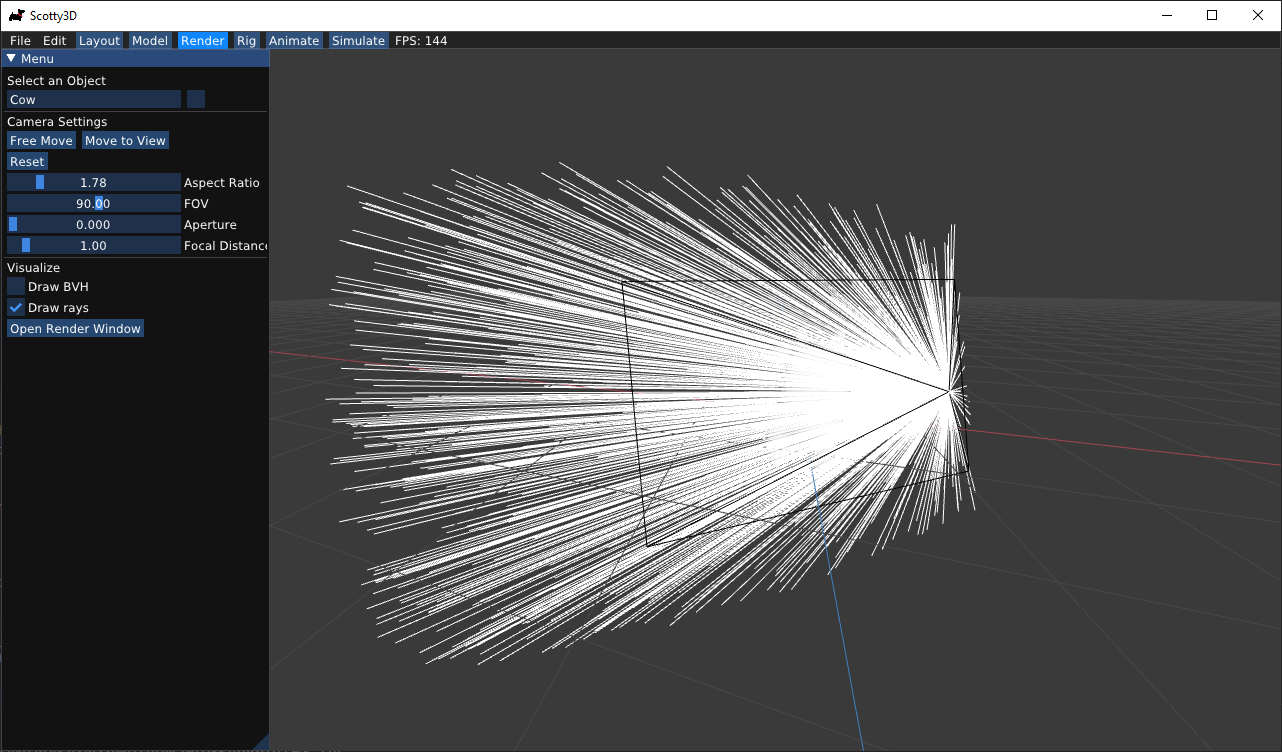
The render mode comes with its own camera, representing the position, view direction, field of view, and aspect ratio with which to render the scene. These parameters are visually represented by the camera control cage, which shows up as a black wire-frame pyramid that traces out the unit-distance view plane. Note that changing camera settings (e.g. field of view) will adjust the geometry of the camera cage.
To move the render camera to the current view, click Move to View. This will reposition the camera so that it has exactly what you have on screen in view.
Feel free to play around with the field of view (FOV) and aspect ratio (AR) sliders - they will adjust your current view to use these values, so you can see how exactly the effect the visible region.
Mesh Options
There are 5 options under each mesh instance’s Object tab.
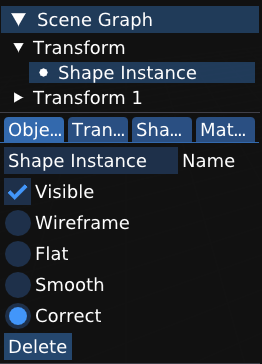
Visible: toggle for whether we see the mesh instance in a scene or not (and hence whether the mesh gets rendered or not)Wireframe: turn the mesh into a wireframe mesh, which consists only of vertices and edges but no facesFlat: perform “flat” interpolation, where every fragment emitted contains the same attributesSmooth: perform screen-space interpolationCorrect: perform perspective-correct interpolation
Note that you can only choose one of the four mesh types (wireframe, flat, smooth, correct) at any given time.
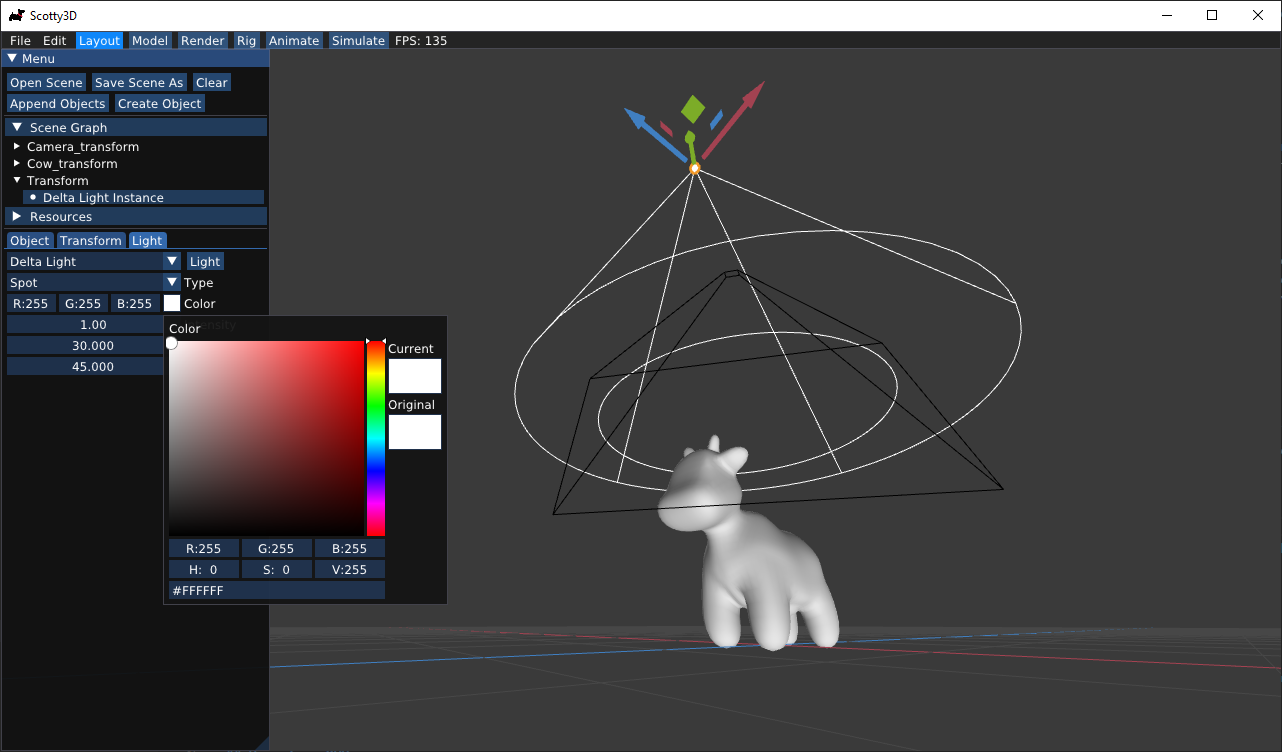
Create light
The two rasterizer types do not require light to render, but pathtracer does. There are two ways of creating a light source in a scene.
One method is by creating a light instance object. Go to Layout mode, click on Create Object, and select either Delta Light Instance or Envirnoment Light Instance. Once a light instance object has been created, you will be able to choose from a variety of lighting types and infinite environment lights. (To implement support for environment lights, see PathTracer task 7.)
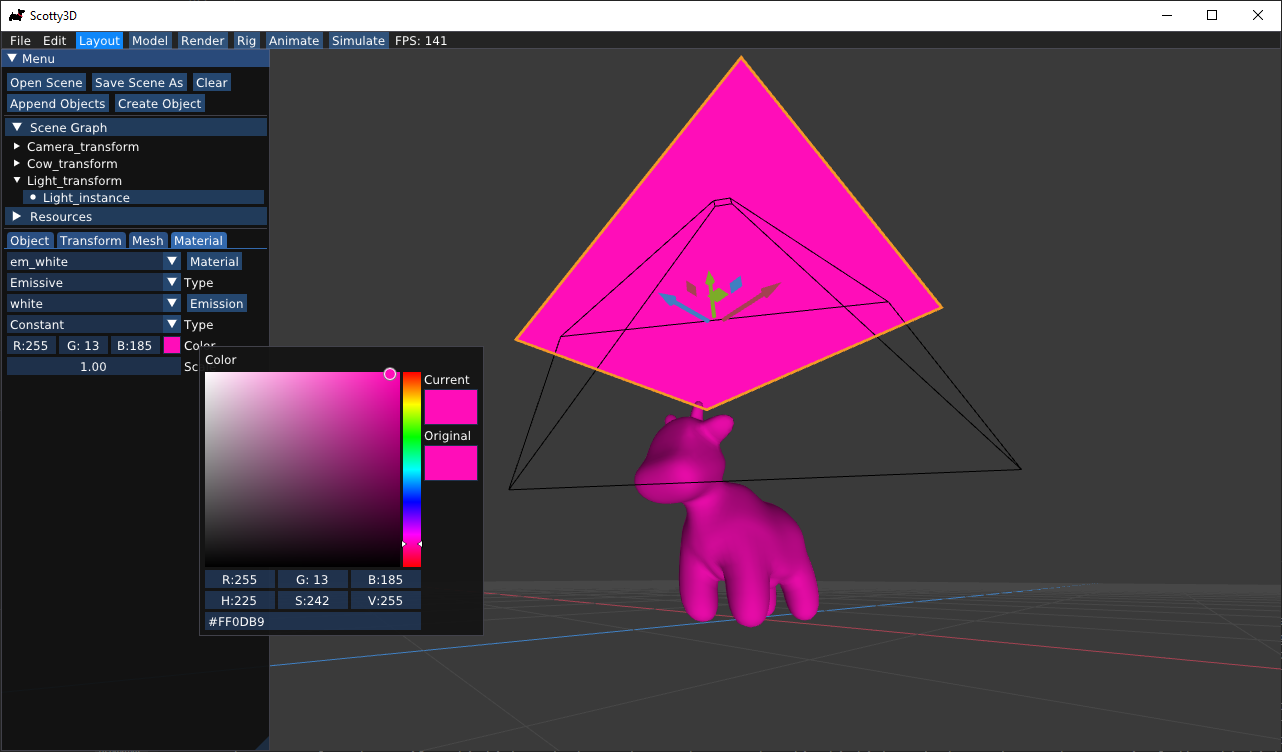
Additionally, any object can be made into an emissive area light by changing its material type to Emissive. Mesh-based area lights can produce much more realistic lighting conditions.
Enable Ray Logging for Debugging
In Render mode, simply check the box for Draw Rays, and you would be able to see the camera rays that you generated in Pathtracer task 1 when you start render.
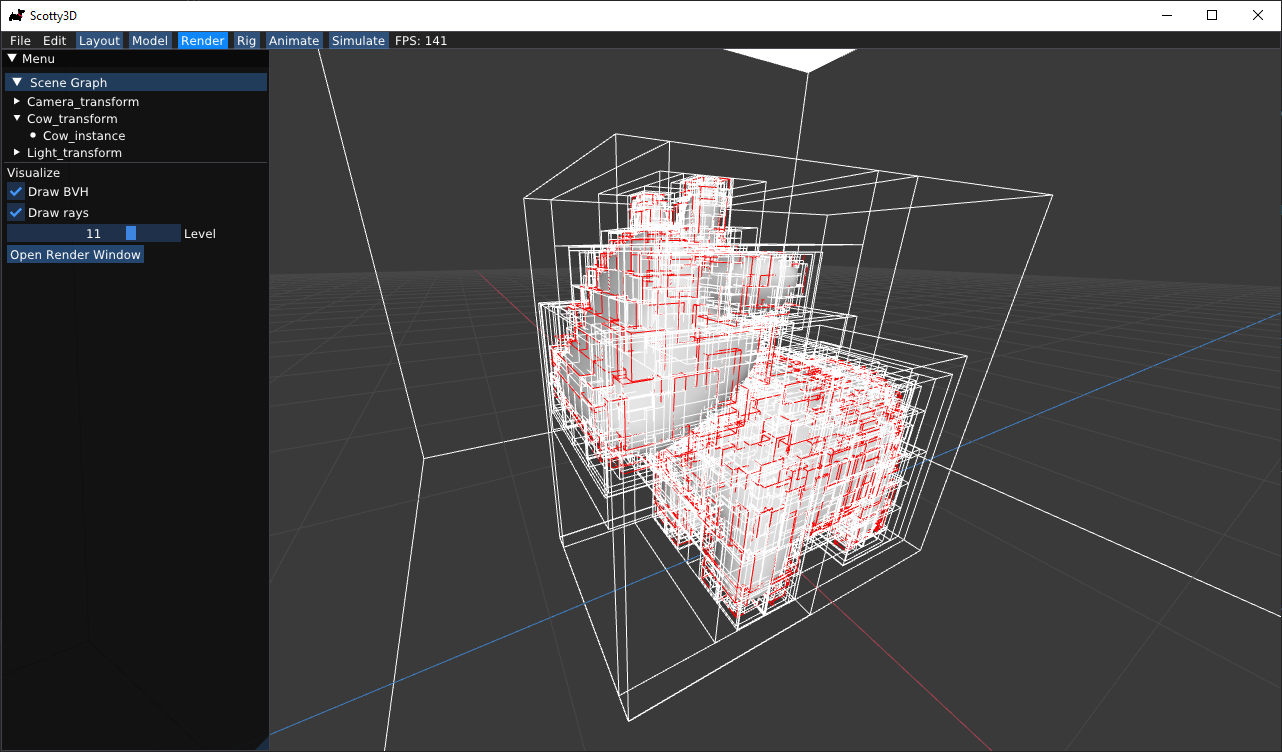
Visualize BVH
In Render mode, simply check the box for Draw BVH, and you will be able to see the BVH you generated in Pathtracer task 3 when you start rendering. You can click on the horizontal bar to see each level of your BVH.
Materials and Other Object Options
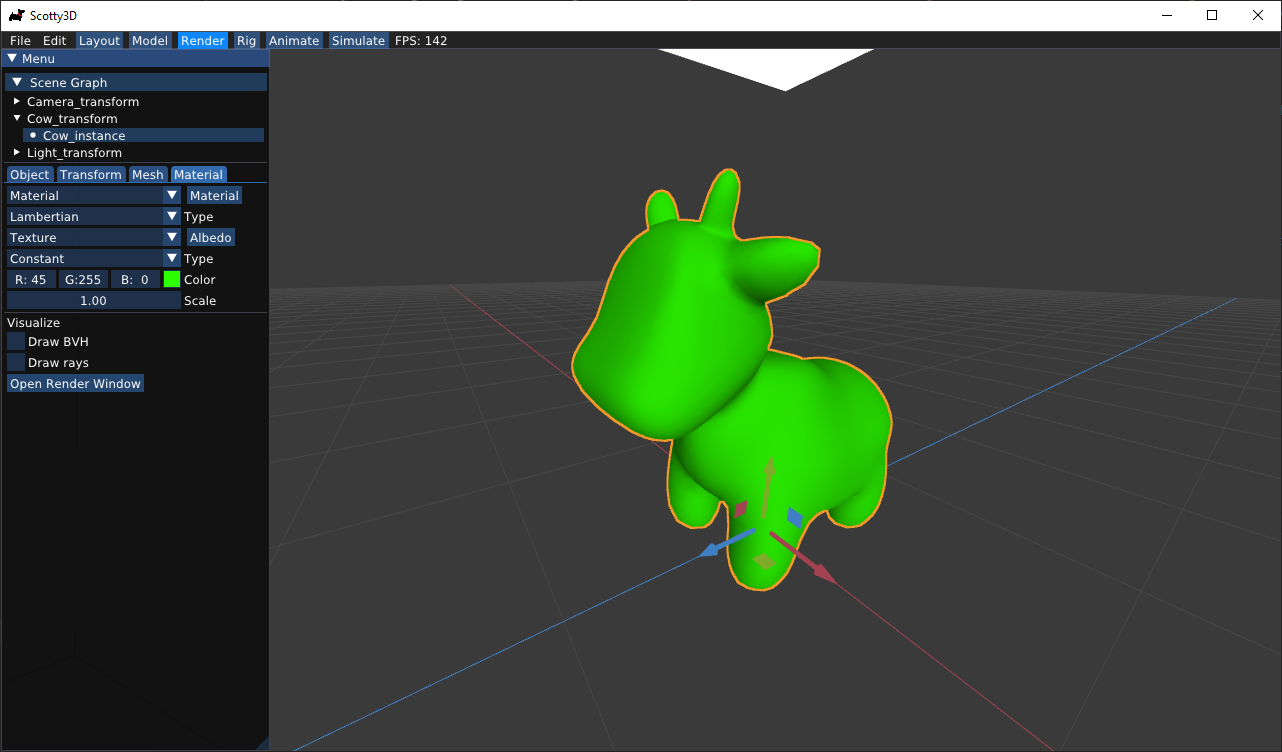
You can change the material and other property of your mesh by selecting the object and selecting the corresponding tab. For example, you can make a colored cow by Material -> Lambertian type -> Constant type, and pick a color that you like.